From Code to Kubernetes: Deploying a Containerised Application on AKS
When working with Azure, setting up the right environment is the first step toward managing your applications effectively.
In this guide, we'll walk through the process of creating:
- Resource Group
- Virtual Machine (VM)
- Clone the repository
- Building a Docker image
- Push Image to an Azure Container Registry (ACR)
- Deploy Image Azure Kubernetes Service (AKS)
Prerequisites
- An active Azure account.
Create a Resource Group
A resource group is a container for managing your Azure resources. A resource group is essential because deleting a resources group will delete all the resources( eg, VM, cluster), all at once, instead of deleting them individually yourself. To create a new resource group, follow the steps below.
Go to your Azure portal and in the search bar, type resource and click on the first one.

Now click on Create

Provide your Resource group name as shown below:

Click on the Next : Tags button below which will take you to the tag page. Add a tag as shown below:
Note
Tagging your resources is important for tracking usage and managing costs across different environments effectively.

Then click on the Next:Review + create button, which will take you to the page shown below:

And finally, Click Create. This will create your resource group.

Well done! Your resource group has succussfully been created. Now, let's move on to the next stage.
Create a Virtual Machine(VM)
1. Setting up
Now, we will create a VM within our resource group. In this VM we will install and configure kubectl, so we can communicate with the K8s cluter from the CLI. To create a VM, follow the steps below:
Go to your Azure portal and in the search bar, type virtual and click on the first one.

Click on Create, then Click on Azure Virtual machine

Fill the information as show below:
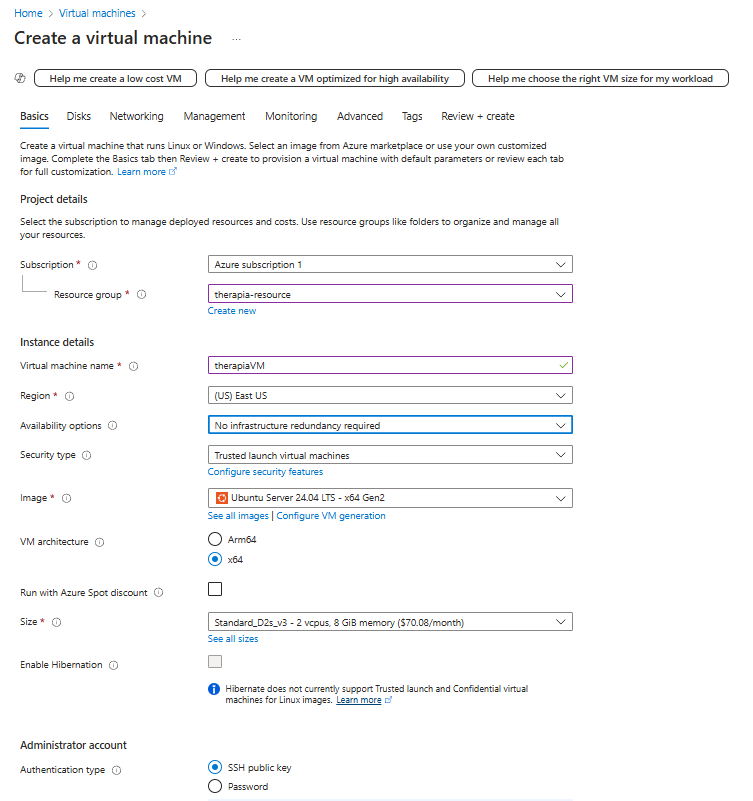
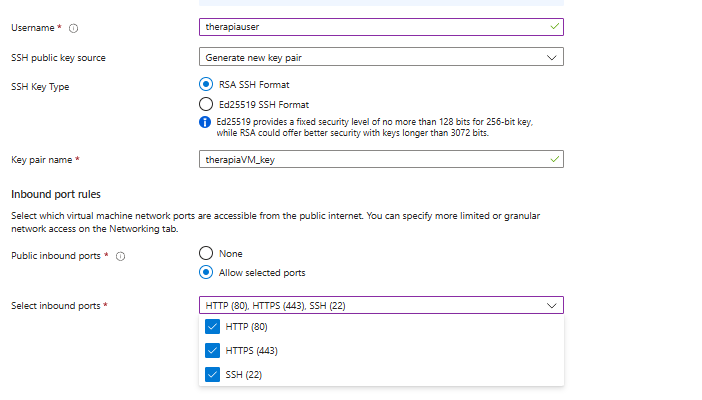
Leave everything as it is and click on Tags
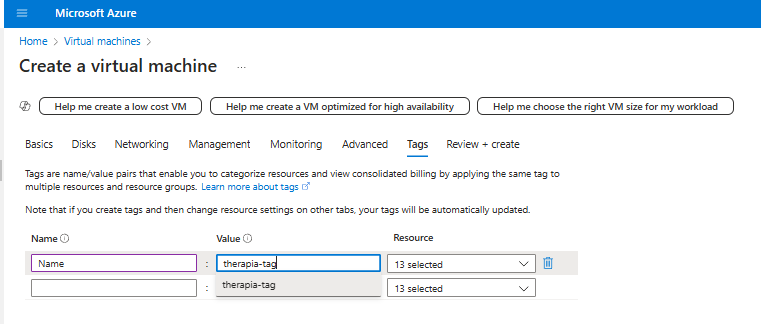
Put in your tags, then click on Review + create.
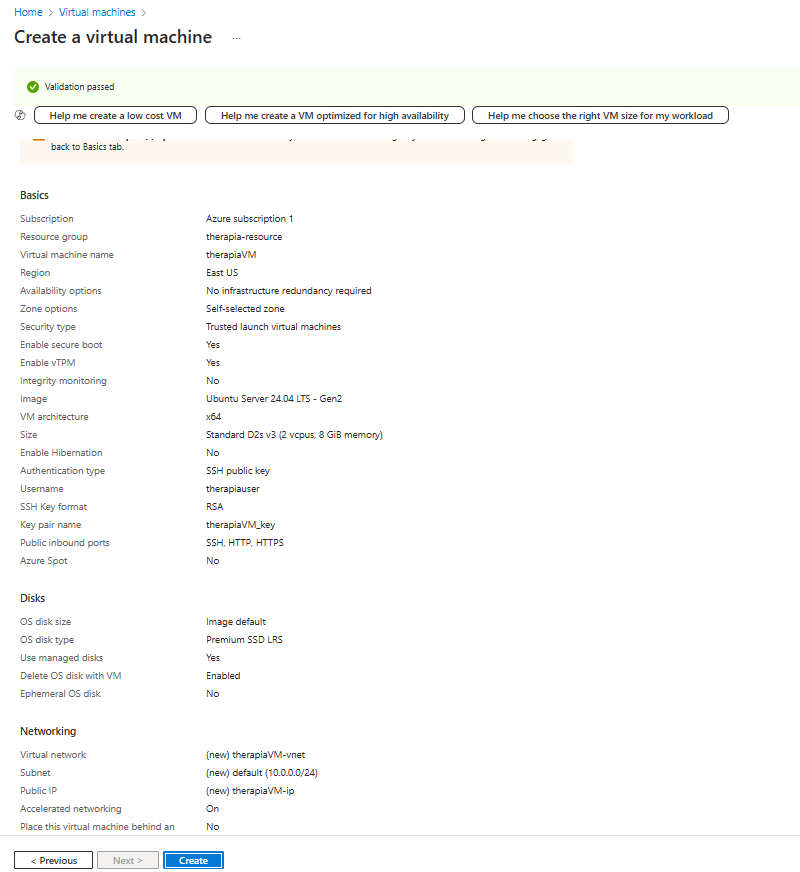
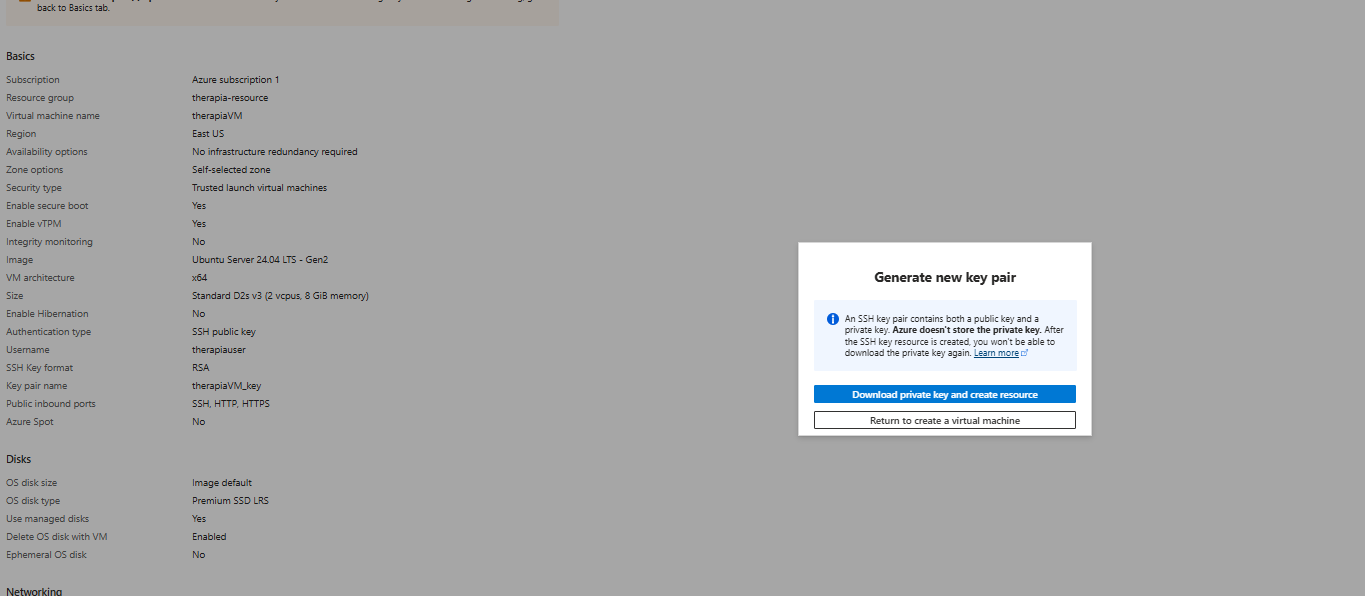
You will see all the information about your VM to be created. Click Create
Now click on the Download button to download your RSA Key
Click on Go to resource
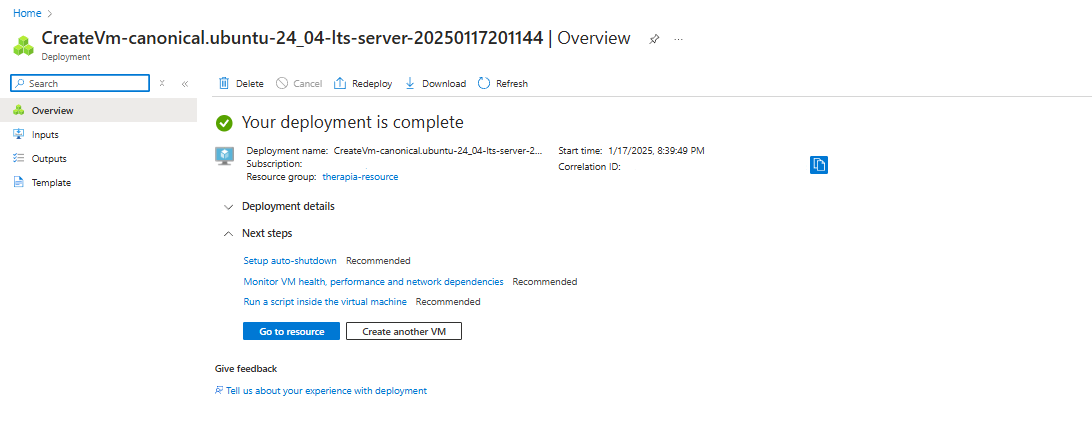
Congratulations! You've successfully set up your VM.
2a. Connect via SSH
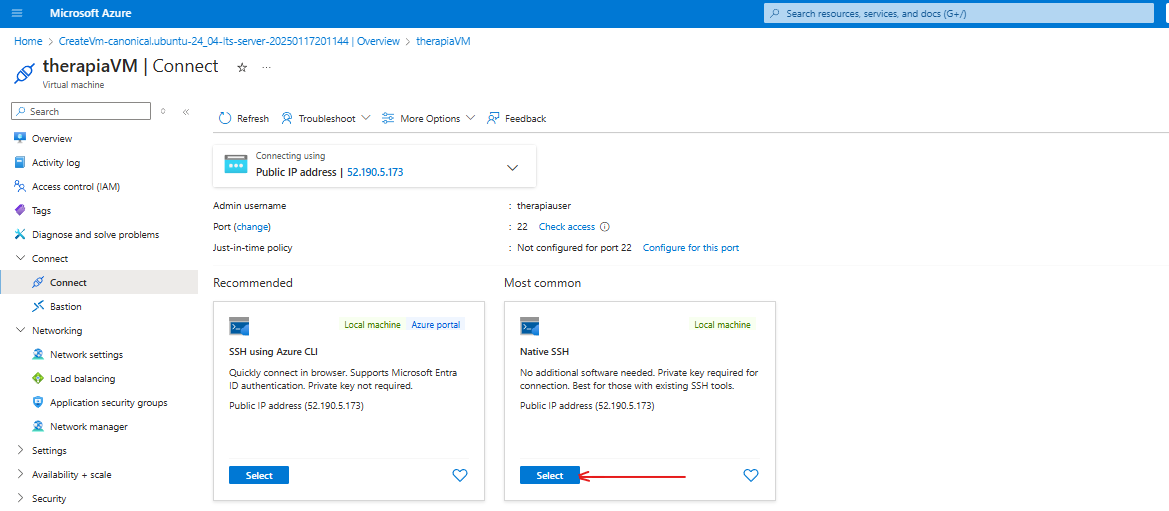
To connect to the VM, click on connect, connect

We will connect to our VM using Native SSH. Click on Select
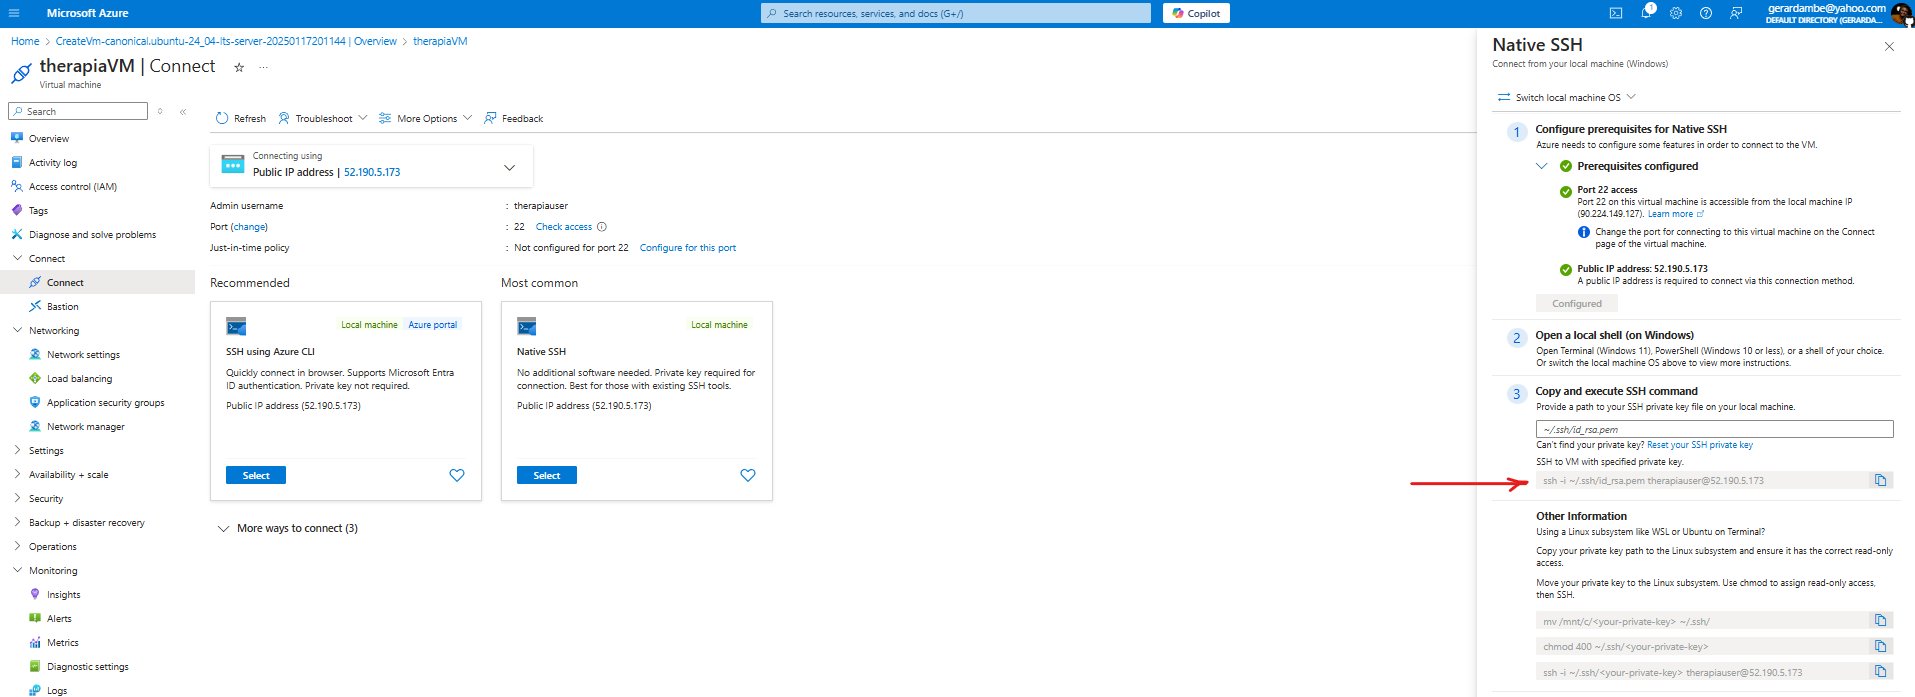
Copy the command and paste it on your Notepad.
2b. Connect via CLI
- Create a folder on your PC and name it anything you like. Move the key you created into this folder.
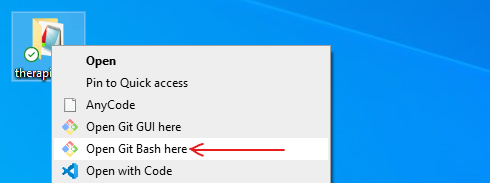
- Next, right-click on the folder and open it in a Command-line Interface (CLI). For example, I am using Git Bash in my case.
Type ls in your terminal, and you will see your key listed.

Now to connect to your VM, paste the SSH command you copied earlier into the terminal. Replace ~/.ssh/id_rsa.pem with your key as shown below.

Press Enter and type yes to confirm.

You have now successfully SSH into your VM from your CLI.

2c. Installing Docker
Run the command to install Docker on your VM
sudo apt update
sudo apt install docker.io -y
sudo usermod -aG docker therapiauser
sudo systemctl restart docker
sudo chmod 777 /var/run/docker.sock
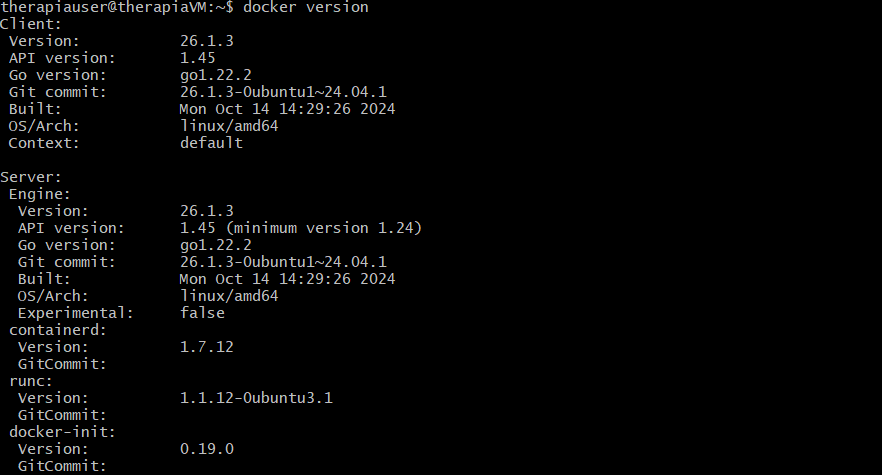
Now, let's check if Docker is installed.
docker version
Congratulations on making it this far!
Clone the repository
To build the image locally, first we will clone the repository and cd into the flask-app directory that contains the Dockerfile and use the commands to build the docker image. Run the commands below:
git clone https://github.com/Gerardbulky/azure-therapia.git
cd azure-therapia
Build Docker image:
docker build -t therapia-image:latest .
Run the Docker image using:
docker run -d -p 5000:5000 therapia-image:latest
Check if the docker image is running:
docker ps
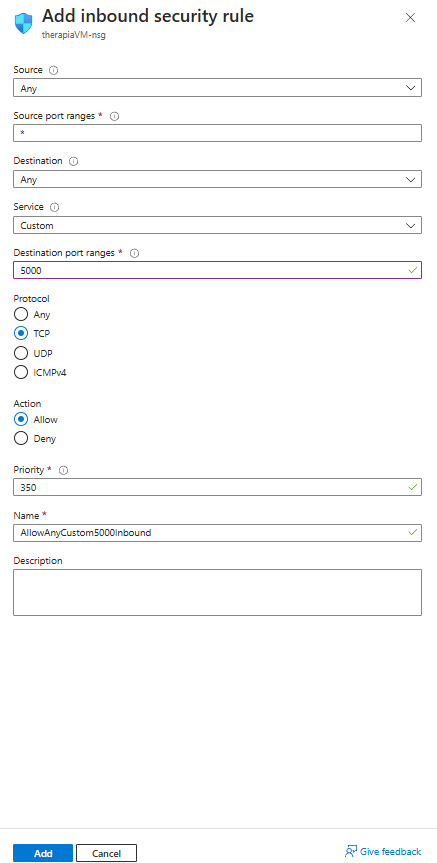
Update Network Security Group Rules
In other to access our application over Port 5000, we need to update the NSG rules.
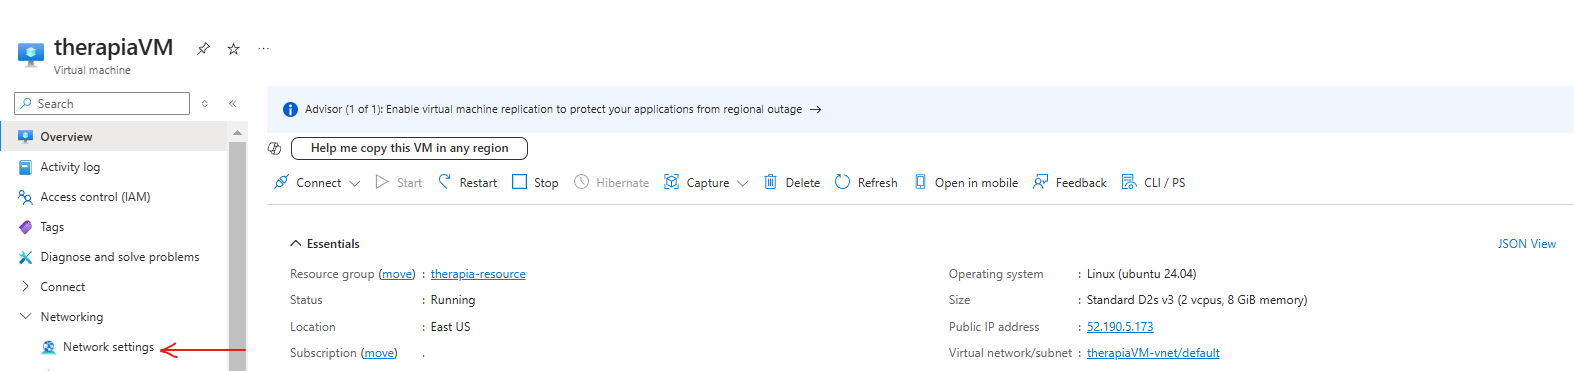
Go to Virtual machines, then go to Networking and click on Network settings.
Click on Create port rule and select Inbound rule
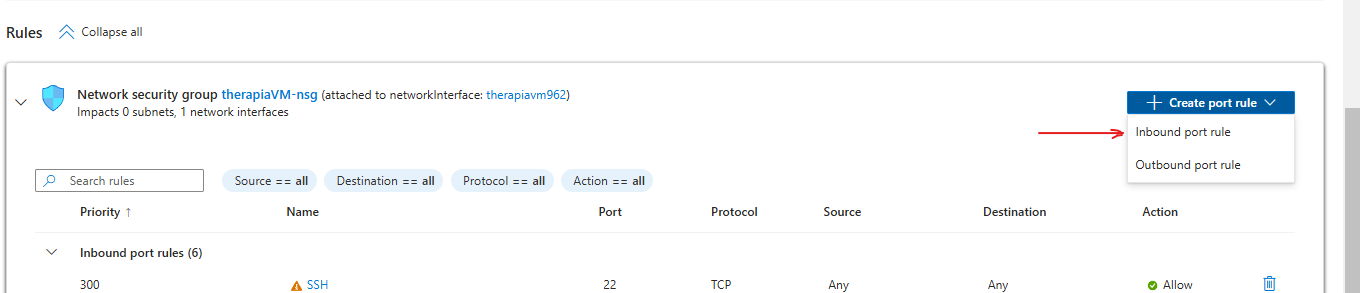
Change the port to 5000, protocol to TCP and click Add.
Accessing the Application
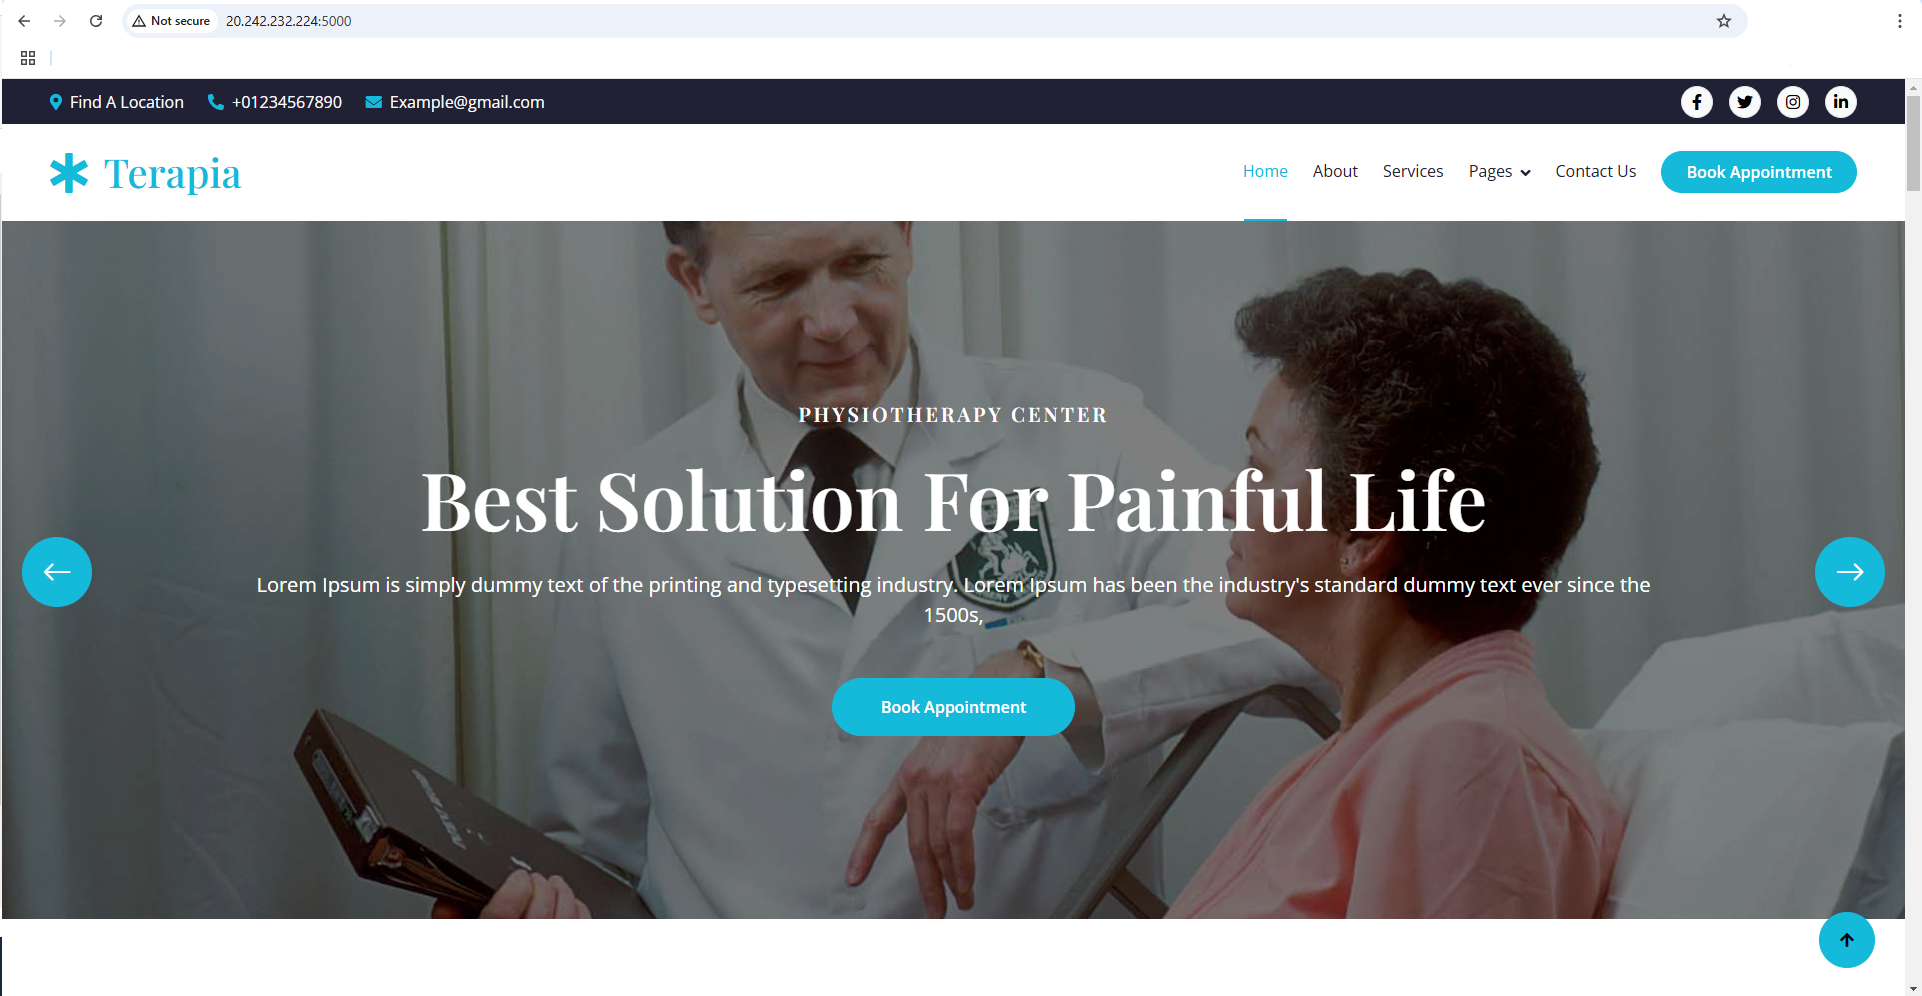
Open your web browser and enter your Virtual Machine's IP address followed by port 5000, as shown below:
http://<
Good Job! You can now see your application on your web browser. Grab a cup of coffee while we move on to the next stage: Pushing image to ACR.
Build & Push Image To Container Registry
Azure Container Registry(ACR) allows us to store, build and deploy images on Azure. We will need to create a registry to store our image.
We will need to install the Azure CLI to create our ACR account.
1. Install Azure CLI
On your terminal run the following command:
curl -sL https://aka.ms/InstallAzureCLIDeb | sudo bash
az login
Right-click, copy the URL and code and paste in your web browser. This will log you into your Azure account from your terminal.

You will be logged into your Azure account from the terminal. Press Enter

You are now logged into Azure from your CLI.

2. Create Azure Registry
Replace the <container_registry_name> with a container name of your choice. It should be in lowercase and no hyphen(-) and is unique. For example, my container name is therapiacontainer, and if you choose to use a similar name, consider adding some characters to make yours unique, such as therapiacontainer01.
az acr create --resource-group therapia-resource \
--name therapiaregistry \
--sku Basic \
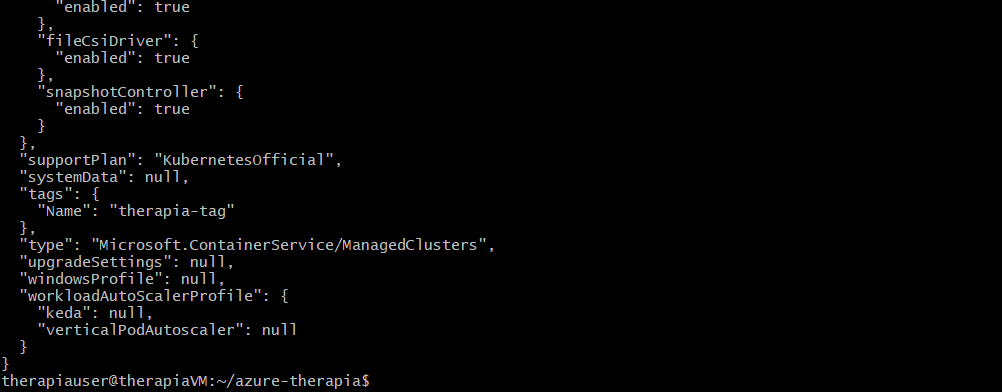
--tags Name=therapia-tag
Your ACR is successfully created.

To view your ACR, go to the Azure portal and on the search bar, type container registries and click on it.

Click on your ACR. Copy the login server url and paste in on a note pad as you will need it later on.

3. Build & Push Image To Container Registry
Before pushing the image, we must authenticate with the Azure Container Registry(ACR). In the Azure CLI, run the command to log you into the ACR:
az acr login --name therapiaregistry

Build the Image:
docker build -t therapiaregistry.azurecr.io/therapia-image:latest .
Push Image:
docker push therapiaregistry.azurecr.io/therapia-image:latest
To verify the image is created in your Azure Container Registry, run the command.
az acr repository list --name therapiaregistry --output table

You should be proud of yourself for making it this far.
Deploying Image to AKS
To create an AKS cluster, you can follow the steps below. If you're experienced with Azure, you can skip the networking setup. If you're new to AKS or Azure, I recommend following each step to understand the related services better.
Go to your Azure portal and in the search bar, type kubernetes and click on the first one.

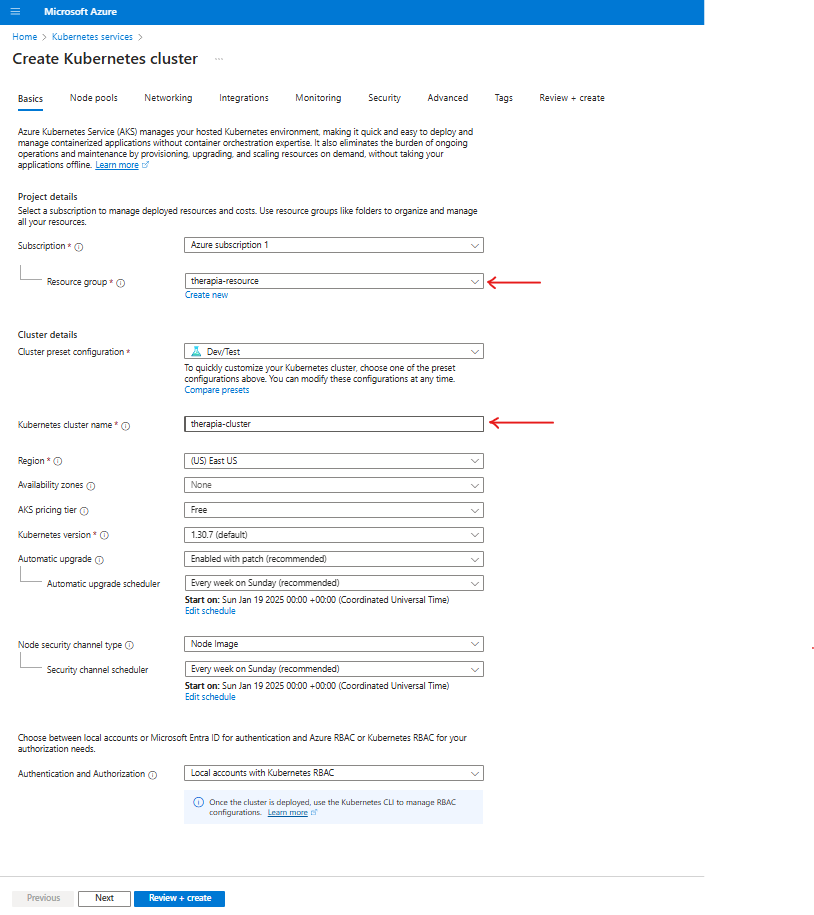
Click on Create, then Kubernetes cluster.

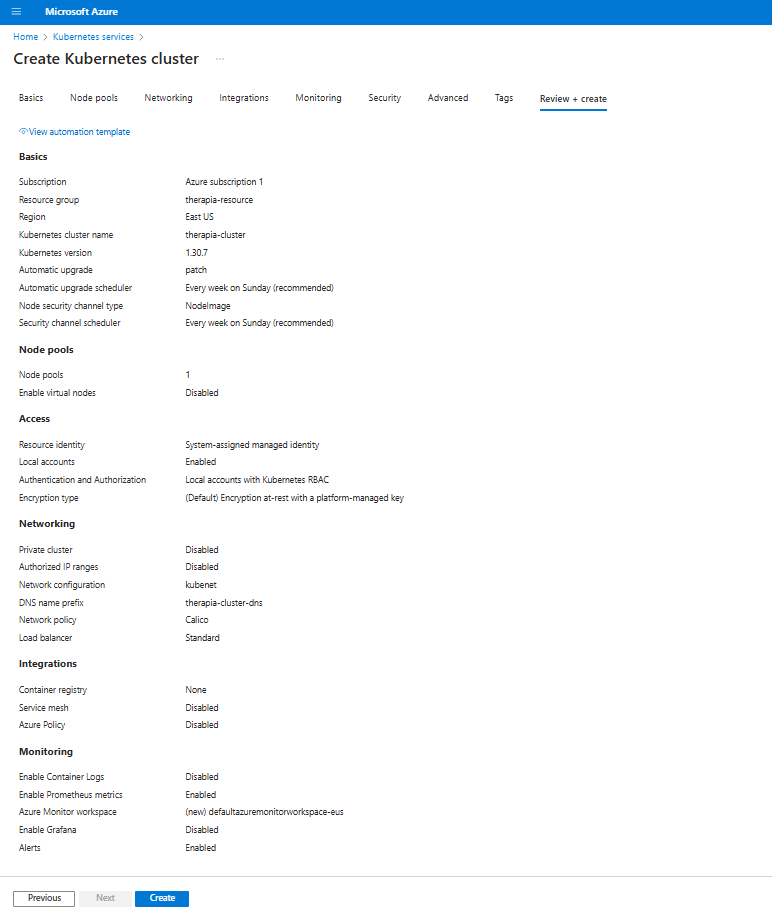
Select your resource group name, add a cluster name. Click on Next.
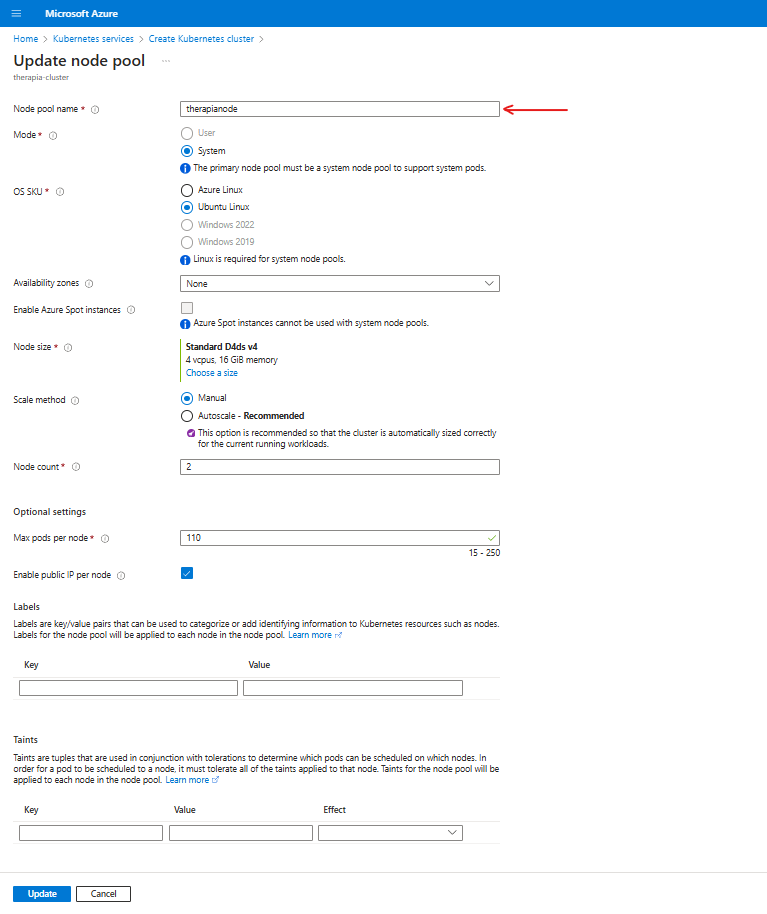
In the Node pools, Provide the name of the Node pool and click on update.
In the Networking, Select kubelet and Calico as Network policy.

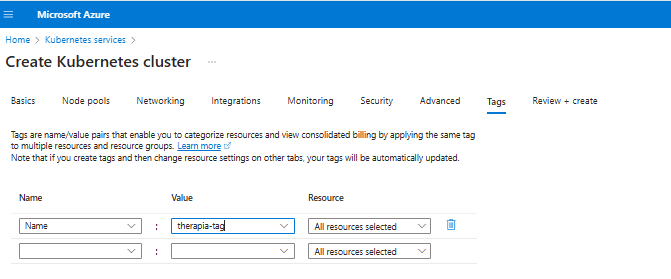
Now go to Tags, select your tag and click on Review + Create.
Check your resources and click Create.
Once your deployment is complete, click on Go to resource.
Congratulations on setting up an AKS Cluster.
1. Install Kubectl
We need to install kubectl to connect the cluster to the terminal. In your terminal, run the following commands:
curl -O https://s3.us-west-2.amazonaws.com/amazon-eks/1.28.3/2023-11-14/bin/linux/amd64/kubectl

curl -O https://s3.us-west-2.amazonaws.com/amazon-eks/1.28.3/2023-11-14/bin/linux/amd64/kubectl.sha256

sha256sum -c kubectl.sha256

chmod +x ./kubectl
mkdir -p $HOME/bin && cp ./kubectl $HOME/bin/kubectl && export PATH=$HOME/bin:$PATH
echo 'export PATH=$HOME/bin:$PATH' >> ~/.bashrc

kubectl version --client

2. Connect Azure AKS to CLI
Go to your Azure cluster portal. Click on Connect From your CLI, run both commands to connect to AKS.


Now, you can run the command to list the nodes.
kubectl get nodes

3. Grant AKS Access to ACR
We need to grant the AKS cluster access to pull the image from the ACR. Run the following command:
az aks update -n therapia-cluster -g therapia-resource --attach-acr therapiaregistry
To Verify that the AKS cluster can pull images from ACR, run the following command:
az acr list --resource-group therapia-resource --query "[].{acrLoginServer:loginServer}" --output table

Deploy Application yaml
Now, let’s try to deploy the containerised application on AKS.
From your terminal,
nano deployment.yaml
Paste the code snippet. Replace <container-registry-name> with your ACR name.
apiVersion: apps/v1
kind: Deployment
metadata:
  name: therapia-deployment
  labels:
    app: therapia-app
spec:
  replicas: 1
  selector:
    matchLabels:
      app: therapia-app
  template:
    metadata:
      labels:
        app: therapia-app
    spec:
      containers:
      - name: therapia-container
        image: therapiaregistry.azurecr.io/therapia-image:latest
        ports:
        - containerPort: 5000
In Windows:
Press Ctrl + x to exit
Press y, then Enter
kubectl apply -f deployment.yaml

kubectl get pods

Now, Let's host the application outside the Kubernetes Cluster by creating a service for the application.
nano service.yaml
apiVersion: v1
kind: Service
metadata:
  name: therapia-service
spec:
  selector:
    app: therapia-app
  type: LoadBalancer
  ports:
  - protocol: TCP
    port: 5000
In Windows:
Press Ctrl + x to exit
Press y, then Enter
kubectl apply -f service.yaml

kubectl get svc

Copy the EXTERNAL-IP address, paste it into your favorite browser, and add port 5000 to view your application live.
Congratulations on making it this far! This brings us to the end of this tutorial and I hope you found it helpful
Conclusion
In this tutorial, we have walked through the comprehensive process of deploying a containerized application on Azure Kubernetes Service (AKS). Starting from setting up the necessary Azure resources, creating a virtual machine, building and pushing a Docker image to Azure Container Registry (ACR), and finally deploying the application on AKS, you have gained hands-on experience with various Azure services and tools. By following these steps, you should now be able to manage and deploy your applications effectively on AKS. Keep exploring and experimenting with Azure to further enhance your cloud skills. Happy coding!